home remedies for ear infections for toddlers

 Home Remedies For Ear Infections For Toddlers

home remedies for ear infections for toddlers


Ear infection in toddlers can be frustrating in that toddlers can explain what sort of difficulty they are passing through, in this article, the cause, symptom, and home remedies for ear infection for toddlers will be fully revealed.  


Your ear has three main parts: outer, middle, and inner. You use all of them in hearing. Sound waves come in through your outer ear. They reach your middle ear, where they make your eardrum vibrate. The vibrations are transmitted through three tiny bones, called ossicles in your middle ear. The vibrations travel to your inner ear, a snail-shaped organ. The inner ear makes the nerve impulses that are sent to the brain. Your brain recognizes them as sounds. The inner ear also controls balance. 


The ear isn’t just the hearing organ. It is a complex system of parts that not only allows humans to hear but also makes it possible for humans to walk.


CONDITIONS THAT CAN AFFECT FUNCTIONS OF THE EAR

Earache: Pain in the ear can have many causes. Some of these are serious, some are not serious.


Otitis media (middle ear inflammation): Inflammation or infection of the middle ear (behind the eardrum). Usually, this is caused by an infection.


Swimmer’s ear (Otitis externa): Inflammation or infection of the outer ear (pinna and ear canal). Sudden cases are usually infections; chronic otitis is often a skin condition (dermatitis).


Meniere’s disease: A condition in which the inner ear on one side malfunctions. Vertigo, tinnitus, hearing loss, and pain are common symptoms.


Tinnitus: Ringing in one or both ears. Usually, this is due to damage from noise exposure, or from aging.


Cerumen (ear wax) impaction: Ear wax may block the ear canal and adhere to the eardrum. The eardrum’s reduced vibrations impair hearing.


Ruptured eardrum: Very loud noises, sudden changes in air pressure, infection, or foreign objects can tear the eardrum. The small hole usually heals within a few weeks.


Acoustic neuroma: A noncancerous tumor that grows on the nerve traveling from the ear to the brain. Hearing loss, vertigo, and tinnitus can be symptoms.


Mastoiditis: Infection of the mastoid bone, just behind the ear. Mastoiditis can result from untreated middle ear infections.


Benign paroxysmal positional vertigo (BPPV): A disruption of function in the inner ear, causing episodes of vertigo. Although not medically serious, its symptoms can be distressing.


Cholesteatoma: This is a benign condition. It is the abnormal buildup of skin within the middle ear and surrounding bones. Often there is a foul-smelling discharge associated with hearing loss. The condition usually requires surgery to prevent hearing loss.


EAR INFECTION

Ear infection and home remedies,


What is an Ear Infection?

 An ear infection occurs when fluid becomes trapped in the ear. 


Symptoms of ear infections include ear pain, fever, yellow drainage from the ear, and vomiting. Hearing difficulties, ringing of the ears, and balance problems could be signs of fluid buildup. 


CAUSES OF EAR INFECTIONS IN TODDLERS

Outer ear infections are caused by a mixture of heat, sweat, and scratching.


Ear infection for the most part is brought about by bacteria and regularly starts after a kid has a sore throat, cold, or other upper respiratory infection. If the upper respiratory infection is bacterial, these equivalent bacteria may spread to the middle ear; if the upper respiratory infection is brought about by a virus, like a cold, bacteria might be attracted to the microorganism cordial climate and move into the middle ear


Middle ear infections affect the space between the eardrum and inner ear. Inner ear infections can cause inflammation and can affect balance. An untreated ear infection can cause serious complications such as Mastoid it is, Meningitis, hearing loss, and perforation of the eardrum.


Garlic As Home Remedies For Ear Infections For Toddlers

Garlic has been used for years to cure ear infections, garlic tends to take care of ear infections because of its wonderful properties. 


Allicin the compound contained in garlic that only occurs when garlic is crushed or injured has been shown to have a wide-range an of antimicrobial specificity, taking care of any ear infection resulting from bacteria. Ajoene and A. sativum, two powerful compounds found in garlic has been shown to have antiviral activity. 


Garlic can be used as a natural antibiotic and pain reliever. Two to four drops of garlic oil can be applied to the ear 3 to 4 times a day. 

Garlic oil is made by cooking 2 cloves of garlic in 2 tbsp. of olive oil. The solution should be strained before application. 


Olive Oil As Home Remedies For Ear Infections For Toddlers

 Olive oil is one of the easiest ways to treat an ear infection . this remedy softens the wax, which makes it easier to remove buildup. A few drops of olive oil should be applied to the ear after it has been warmed. After the wax has softened, it can be removed with cotton swabs.


Basil as Home Remedies for Ear Infections for Toddlers: 

Basil is an effective way to cure ear infections. Basil juice can be made by crushing 4 to 5 leaves to extract the juice. Basil oil can also be mixed with a carrier oil and applied around the ear.


This treatment should be applied twice a day.


Onions as Home Remedies for Ear Infections for Toddlers:

Onions are one of the most common ways to treat an ear infection. People have the option to use onion juice or a compress.


A few drops of onion juice can be applied to the ear twice a day. An onion compress is made by cutting an onion in half and roasting it in the oven for 1 minute. The onion should be placed in a cloth and held against the ear for 10 minutes.


Tea tree as Home Remedies for Ear Infections for Toddlers

Tea Tree Oil can be used as an antibacterial, antiviral, and antiseptic treatment.

Three drops of tea tree oil, 2 T. olive oil, and 1 t. lemon juice can be heated to soothe and cure ear infections. The application should be applied with a dropper 2 to 3 times a day. 


Mullein Oil as Home Remedies for Ear Infections for Toddlers

Mullein Oil will need to be prepared a few weeks in advance. The ingredients for this remedy include dried mullein, 2 to 3 crushed garlic cloves, St. John's worth, 1/4 t. of Vitamin E oil, and olive oil. The mullein oil should be placed in a mason jar before adding the herbs. The jar should be filled with olive oil one-half inch from the top. The Vitamin E oil should be applied before sealing the jar and soaking it for 2 to 4 weeks. The oil can then be strained and placed in another bottle. Three to five drops can be applied for 15 minutes. An ear infection is a buildup of fluid or wax that causes inflammation and discomfort.


Antibiotic treatment for ear infections. These homeopathic treatments use garlic, olive oil, basil, onion, tea tree oil, and mullein oil to cure the infection.


Don't forget to Share:

How to sleep with toothache

How to sleep with toothache


What Is Toothache? 

Toothaches or dental pain is a pain in the teeth or their supporting structures, caused by dental diseases or pain referred to the teeth by non-dental diseases. When severe it may impact sleep, eating, and other daily activities.

Toothaches symptoms

Tooth pain that may be sharp, throbbing, or constant. In some people, pain results only when pressure is applied to the tooth (biting down on something).
Fever or headache.
Foul-tasting drainage from the infected tooth. Other symptoms might include:
  • Pain with chewing
  • Hot or cold sensitivity
  • Bleeding or discharge from around a tooth or gums
  • Swelling around a tooth or swelling of your jaw
  • Injury or trauma to the area

Toothaches Causes

  • The use of sugary foods, for example, sweets, chewing gums, candies, soft drinks
  • Cavities (tooth decay)
  • Chipped or broken teeth
  • Damaged fillings
  • Infected gums, 
  • viral, bacterial, or fungal infection in your sinus cavity. 
  • Putting other pressure on the tooth
  • Cold drinks

Toothaches Prevention

  • Stop smoking and the use of tobacco 
  • Always brush or rinse your mouth after a meal, leftover food particles are the breeding ground for bacteria. 
  • Chew your food properly as it serves as tooth exercise. 
  • Stop taking ice and chilled drinks
  • Eat food that contains calcium 
  • Avoid hard substances and bones, they can break your teeth. 
  • Use a soft toothbrush and brush gently to avoid injuries in the gum.  


How to sleep with toothache, Home treatments

  • Place pulverized activated charcoal on the area. Brushing your teeth with charcoal will also prove beneficial OR
  • Chew clove and place it on d particular tooth. Leave it there for 5 minutes then throw it out. Do it like 4 times it will go. OR
  •  Use ginger water, the same process, it will take care of the toothache. OR
  • To relieve toothache, chew guava leaves or apply leaves past on affected tooth/teeth.
    DOSAGES
    7 to 10 younger fresh leaves (or 5 to 6 older ones) should be boiled with 1 liter of water in a closed pot over a gentle flame
    OR
    1 tablespoonful of the powder of dried leaves boiled in 1 Liter of Water in the same way

Don't forget to Share:

How To Sprout, Eat Sprout and preserve it

How To Sprout, Eat Sprout and preserve it
#Benefits of Sprout, #what is Sprout, #types of Sprout, #how to Sprout grains. #soaking sprouts


WHAT ARE SPROUTED FOODS, [THE MEANING OF SPROUT]

Sprouted grains are simply whole grain seeds that have just begun to germinate, and then are harvested before they can grow into a plant, 

COMMON TYPES OF SPROUTS.

Wheatgrass

Broccoli Sprouts. 

Radish Sprouts. 

Red Clover Sprouts. 

Mung Bean Sprouts. 

Alfalfa Sprouts


DIFFERENCES BETWEEN SPOURT AND WHOLE GRAIN 

Sprouted whole grains and regular whole grains contain the same nutrients, but in different quantities. The sprouting process activate the nutrients in the seeds, making sprouts more nutritious and fibrous. 


#Benefits of Sprout, #what is Sprout, #types of Sprout, #how to Sprout grains. #soaking sprouts


HOW TO SOAK AND SPROUT GRAINS.

There are several ways to sprout grains and each uses different tool. The most common tools are bags, jar, trays, and tubes. 

Bags sprouting: Sprouting bags are made from hemp or nylon mesh. The fine weave of the fabric means that you can use the bag to Sprout seeds of any kind; the bag’s porous nature makes drainage easy. All you have to do is to hang bag 

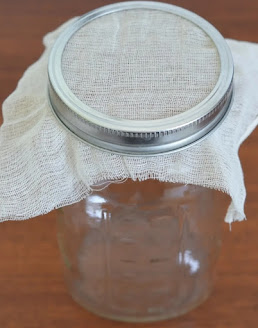
Jars sprouting. To keep the seeds in the jar as you rinse and drain, secure a fine mesh screen (nylon screen works best and is easiest to clean, but cheesecloth works well, too) over the opening, either with the screw-on ring that comes with most jars or with a thick rubber band. 

Tray sprouting. Tray sprouters are made of plastic, with plastic bottoms and plastic-mesh bottoms cover. All that mesh makes draining with a tray sprouter fairly easy. Because tray sprouter are stackable, they are great if you want to grow a lot sprouts, or a few different crops at once. 

Tubes sprouting. The tube method allows for air circulation and easy draining because there is a screen lid on either end. 

Soaking sprouts. Dry seeds are dormant, so you must soak them to wake them up. You can never use too much water for soaking, but different varieties of seeds do absorb different amounts of water. Most seeds should be soaked for an average of 8 to 12 hours; some require more, others less. After your seed have soaked, run your fingertips over any seeds floating on the surface to see if they will sink. If they don’t  skim them off and throw them away. Pour the seeds into your sprouting jar and cover it with the straining mesh. 


#Benefits of Sprout, #what is Sprout, #types of Sprout, #how to Sprout grains. #soaking sprouts

Turn the jar upside down and at an angle so that excess water can drain and air can circulate. Place the jar in a bowl to catch the water. Keep it out of direct light and ideally at a temperature between 68 to 75°F.  Every 12 hours or so, pour water into the jar and swirl it to evenly rinse all the grains. Pour off the water and invert the jar.


HOW TO SPROUT GRAINS FOR FLOOR

  Sprouted grains may be dried in a dehydrator, low-temperature oven, or in the sun. After drying the sprouted grains, you may grind them into flour.


WHAT ARE THE BEST SPROUT GRAINS TO EAT

Grains that can be sprouted include any viable seed, such as alfalfa, clover, whole-grain wheat, rye, millet, and oats, amaranth, (unhulled) barley, buckwheat, corn, einkorn, farro, kamut, millet, quinoa, rice, rye berries, sorghum, spelt and any other kind of whole grain.


HOW TO EAT SPROUTED GRAINS 

#Benefits of Sprout, #what is Sprout, #types of Sprout, #how to Sprout grains. #soaking sprouts


Add sprouts to your yogurt

It could be buttermilk, regular curd or Greek yogurt. Just toss in some sprouts and you have a crunchy yogurt in place of a plain one. Add some chat masala or pepper to level up the taste.


Try these different breakfast recipes which are filled with the healthful benefits of sprouts and witness your health transform

Sprout salads/chaat

Some people have salads in breakfast. If you are one of them, then you must really toss in some sprouts in your salad. It won't just make it crunchier but also more nutritious. Add a dressing to it and you are ready to have a bite of a very nutritious and tasty breakfast.

Add sprouts to your oats

If you have a cup of oats every morning then you can make it even more nutritious by adding sprouts to it. Throw in some fruits to make it sweet. Now you have a crunchy sweet oatmeal that will fill you up and also nourish you.


BENEFITS OR ADVANTAGES OF EATING SPROUTS. 

#Benefits of Sprout, #what is Sprout, #types of Sprout, #how to Sprout grains. #soaking sprouts


Sprouted grains have many health benefits.

INCREASED ABSORPTION. It also breaks down phytate, a form of phytic acid. This phytic acid is responsible for the inhibition of germination in seeds and grains until they are planted. 


Research suggests that decrease in absorption of vitamins and minerals in the body is due to the presence of the phytic acid.


LESS CALORIES AND SODIUM

 Sprouted grains also may have less carbohydrates, calories and sodium. During sprouting, some of the carbohydrates contain in grains are broken down and converted to simple sugar, proteins are broken down into amino acids, and fats are broken into the component fatty acids. These conversions makes the Sprouted grain  easier to digest than regular grains. 

Increase in nutrient 

Sprouted grains there are more available nutrients than mature grains,”. Those nutrients include folate, iron, vitamin C, zinc, magnesium, and protein.  

IMPROVES DIGESTION 

Sprouts are known to help in digestion. Sprouts contain a high amount of living enzymes inside them which help in breaking down the food to such an extent that it becomes easier for the digestive tract to absorb nutrients.

INCREASES GOOD CHOLESTEROL Omega-3 fatty acids are present in abundance in the sprouts. These acids are known to increase the good cholesterol.

BOOST BLOOD CIRCULATION 

. Sprouts help in boosting blood circulation. They contain a significant amount of iron and copper, which helps in maintaining a good amount of red blood cell count. This further helps in optimising the performance of cells and organs in our bodies. A healthy blood supply will also stimulate hair growth

Helps Lose Weight. 

If you are worried about consuming too many calories, then sprouts are the best option for you. They have negligible amount of calories. Sprouts are also rich in fibre which will make you feel full for a longer period of time. They are also known to inhibit the release of the hunger hormone known as ghrelin.


DISADVANTAGES AND RISK OF SPROUTED GRAINS

Sprout production is a science with the need for quality monitoring and cleanliness. The warm, humid conditions required for sprouting are also ideal for bacterial growth of pathogens. If seeds are contaminated, Salmonella and E. coli O157:H7 bacteria will quickly grow to unsafe levels, leading to foodborne illness.

Sprout Preservation.

If you will not dry and process to flour as described above, then refrigerate the Sprout, Rinse and drain the sprouted grains and store them in the refrigerator for a few days to a week. If at any point they smell bad or look slimy, discard them.


Don't forget to Share:

Recipe for Oral Rehydration Solution

WHAT IS ORAL REHYDRATION THERAPY OR SOLUTION AND HOW DOES IT WORK?

Oral rehydration solution, best oral rehydration therapy. Diarrhea, vomiting, stooling.
ORAL REHYDRATION THERAPY


WHAT IS ORAL REHYDRATION THERAPY 

ORAL REHYDRATION THERAPY (ORT) is a type of fluid replacement used to prevent and treat dehydration, especially that due to diarrhea. It involves drinking water with modest amounts of sugar and salts, specifically sodium and potassium.


Why Oral Rehydration Therapy 

Rehydration drink provides potassium, glucose, sodium and balances the body’s electrolytes. It is life-saving and should be given immediately at the very sign of diarrhea. 
Any of the rehydration drinks that the ingredients are handy can be prepared. 

Symptoms Of Dehydration

Signs of mild or moderate dehydration include:

  • Thirst
  • Dry or sticky mouth
  • Not peeing very much
  • Dark yellow pee
  • Dry, cool skin
  • Headache
  • Muscle cramps

Signs of severe dehydration include:

  • Not peeing or having very dark yellow pee
  • Very dry skin
  • Feeling dizzy
  • Rapid heartbeat
  • Rapid breathing
  • Sunken eyes
  • Sleepiness, lack of energy, confusion or irritability
  • Fainting

Symptoms of dehydration for babies and young children can be different than for adults:

  • Dry mouth and tongue
  • No tears when crying
  • Dry diapers for 3 hours
  • Sunken eyes, cheeks, soft spot on the top of the skull
  • Sleepiness, lack of energy, or irritability

RECIPES FOR ORAL REHYDRATION SOLUTION


1 Litre/ 1¾ pints of boiled then cooled water
2 level tablespoon of sugar or honey 
¼ teaspoon of baking soda (bicarbonate of soda. If this ingredient is not available then add another ½ teaspoon of salt) 
½ cup of orange juice for taste. If available. 

HOW MUCH ORAL REHYDRATION SOLUTION SHOULD BE GIVEN 

Sip the mixture every 5 minutes day and night until urination normalizes. 
About 1 Litre /1¾ pints a day should be used for a small child 
1 glass for each watery stool produced and 3 Litres/ 5¼ pints a day for adults. 


BEST NATURAL ORAL REHYDRATION SOLUTION

1 Litre of clean water 
½ level teaspoon salt
8 level teaspoon sugar 
½ cup of coconut water or juice from 2 oranges or a mashed raped banana. 

RECIPES FOR ORAL REHYDRATION SOLUTION 3

1 Litre clean water 
½ level teaspoon salt 
8 heaping teaspoon powdered cereal 
Boil for 5 to 7 minutes to form a gruel
Add ½ cup coconut water or juice from 2 oranges, or 1 mashed ripe banana. 

Don't forget to Share:

Cleanse Colon, Secret of Beauty And Weight Loss

Colon State,Secret of Beauty And  Weight Loss


COULD THE STATE OF THE COLON BE THE SABOTEUR BEHIND ALL YOUR EFFORTS TOWARDS HEALTH, BEAUTY AND WEIGHT LOSS? 


Studies and researches has revealed a great relationship between our health and success in career, relationships, education etc.

Health is a pivotal aspect of our lives, in order to accomplish our goals and objectives, we must have an optimal health.

There are many endless story of people have subscribing to a health and fitness programs, buying several supplements and used several herbs to no avail, to these at the verge of giving up or have already given up I will ask, are you sure this little or minor overlooked aspect have not been sabotaging all your efforts even killing your motivation?

Let’s dive in and unmask this saboteur.

DIRTY COLON BEFITTING FOR COPROPHAGIES
Coprophagia is a term used for animals that feeds on excrement, e.g. Dogs, Rabbits, Dung beetles etc.

 This term is not very common in humans, we are structured in such a way that food is meant to be retained in the system for only 24 hours, and if not eliminated in time, petrification occurs, causing autointoxication.

You must have heard the saying that death begins in the colon, so also does healing begin in the colon. A dirty colon is the mother of all diseases.

The colon is the sewer system of the body, but with neglect and abuse, it becomes a cesspool of toxins that spill over into the body,” Dr. William Hunter. 

Unfortunately, humans are gradually evolving to Coprophagia through the aid of the food industries. When food are processed or made fine [refined], most nutrients are lost and the legs [Fibre] that would have assisted the food or snacks in its journey in and out of our system is crippled and in most cases amputated.

Of the 22,000 operations I personally performed I never found a single normal colon and of the 100,000 performed under my jurisdiction not over 6% were normal,” Dr. Harvey W. Kellogg, M.D

When the waste that was intended by nature to be removed is retained or not removed on time as result of sluggish movement due to the absence of fibre, our body reabsorbs the fluid in the faecal waste, this prepares the way for petrifaction and contamination of incoming food.

Out of 100,000 autopsies that I had attended, less than 10% of the people had normal colons,”
-Dr. Norman W. Walker, D.Sc., Ph.D.

The health our cells been the building block for our body’s tissue, systems and organs is directly linked to the quality and quantity of nutrients supplied it by the blood. A dirty colon leads to a body leaden by toxins which sabotages every effort towards health. If you eat three times a day and excrete less than twice you are slightly constipated, if once in two days you are constipated.


Most people are walking around with at least 7 lbs. of faecal matter in their large intestine…I have seen patients lose that much weight, and their stomach bulge, following colon treatment,”
-Dr. Jack Lamar, M.D.

WHY COLON CLEANSE OR DETOX?

Cleanse your body
Speed up metabolism
Get fit 
Lose weight Lose inches
Be healthy

Dangers Of  Not Cleansing the Colon 

Excess toxins and waste in the body can lead to:
  • Depression. 
  • lack of energy. 
  • skin conditions. 
  • weight gain
  • joint pain
  • headaches
  • muscle-aches
  • chronic fatigue
  • allergies
  • gastrointestinal distress
  • irritability.
  • Etc. 


Herbs That Cleanse The Colon

  • LEMON JUICE: HERB FOR COLON CLEANSE: 


Drink warm water with lemon first thing in the morning. It’s a good way to detox and alkalize your body. Start each day by making a large pitcher of lemon juice and make a point of sipping your way through at least 8 glasses before bedtime. Citrus fruits are rich in the antioxidant limonene, a powerful compound found in the peel that stimulates liver enzymes to help flush toxins from the body and give sluggish bowels a kick.


A hot foot bath is a local immersion bath covering the feet and ankles at temperatures ranging from 100° to 115° F (43°C- 46°C ).


Charcoal has been used for years as a medicinal tool. It is known for its ability to absorb toxins and gases.

  • Sunflower Seeds for Colon Detox 

They are almond alternative. A quarter-cup serving of sunflower seeds is just over 200 calories and provides 3 grams of fibre.

  • Artichok: HERB FOR DETOX 

Reduces your body fat.


  • Garlic: herb for cleaning–


It stimulates the liver into producing detoxification enzymes that filter toxic residues from the digestive system.

  • KIWI: IMPROVES COLON HEALTH. 

Patients with Irritable Bowel Syndrome (IBS) who ate two kiwis a day for a month had less constipation and a general lessening of IBS symptoms than those who didn’t.


  • Mung Beans, Green gram 
 It is incredibly easy to digest and it absorbs toxic residue from the intestinal walls.


  • Oats
Oats are a rich source gut friendly fibre. One cup of oats de- livers 16 grams of fibre, including insoluble, which feeds healthy bacteria in your gut, and a soluble kind called Beta-glucan.


  • Omega-3 Oils 
 Use hemp, avocado, olive, or flaxseed oil while detoxing to help lubricate the intestinal walls. This allows toxins to be absorbed by the oil and eliminated by the body.


  • Burdock root (Arctium Lappa, Seppankizhangu, Tamil) 
The root is a diuretic and has purging effects. It aids the removal of the body's toxins making it an efficient detoxifier.


  • Dandelion root (Simhadanti in Telugu, Sanscrit) 
 It promotes bowel regularity and good hydration levels in the body. it supports bile production, and bile helps transport toxins out of the body. Dandelion also helps the body’s immune system.

You can go through our 7 or 21 days full body detox

Cleaning the colon.

You will need:
1 cup of water
1 tbsp. of organic honey
1 tbsp. of Chia seeds or slippery elm 1 tbsp. of flax seed 1 Apple
Method:
Place everything in a blender and blend until they’re all well combined and the chia seeds start expanding.
Drink the remedy on an empty stomach and eliminate the toxic waste from your colon.

This might assist you in colon cleansing journey. Many have testified to its efficiency

Chia Seeds are rich in protein, nutrients, vitamins, Omega 3 fatty acids and fibre, which makes them excellent for your digestive system and heart health.

Flax seeds are rich in omega 3, antioxidants and fibre as well, meaning they are excellent ally against colon cancer as well. Moreover, it promotes cardiovascular health and intestinal nutrient absorption.


References
Ellen John Pascal; Body Systems, 7 Channels of Elimination & Healing Procedures
Christina Moore


Don't forget to Share:

Best Natural Body Detox/Cleansing program

Best Full Body Detox/Cleansing program

https://vigorphil.blogspot.com/2020/07/best-full-body-cleansing-program.html
Best Full Body Detox/Cleansing program


WHY body cleansing or Natural detox? 
Cleansing  ignites the Body's Healing.
To enhance the healing process of the body, one of the body's needs have to be supplied which is the removal of any toxic substance from body. The body's healing ability increases with this detox because the labour of the liver, kidney, and other elimination channels are relieved..

Natural detox program one
For the first 21 days your foods must be at least 80% raw:


  • Have at least 16 oz of fresh- squeezed vegetable juice twice a day
  • Exercise for 30 minutes, 5 days a week, producing a good sweat each time
  • Get lots of sunshine and fresh air daily by walking outside
  • Be temperate in all working and eating habits
  • Get at least 8 hours of rest every night

Second comes the 3-day water fast:


  • No working or exercise during the fast
  • No TV or other entertainment as the brain needs to focus completely on cleansing
  • Pray and commune with God but don't do any intense study
  • Sleep whenever you feel tired
  • Disconnect the phone and other annoyances
  • Drink lots of water.
Dandelion root (Simhadanti in Telugu, Sanscrit) - It treats a wide range of maladies. It promotes bowel regularity and good hydra- tion levels in the body. And, its fa- mous derivative, dandelion tea, has been used to help with joint dis- comfort. Dan- delion root is used in liver- cleansing product


During the fast you may experience some symptoms you've previously had, or you may feel nothing but tired. Whatever you body needs to do, just listen. You may experience nothing at all which could mean that your body has taken care of whatever it needed to take care of from the foods you have been consuming and your improved way of life. Remember, your body heals in the order it got sick.

Caution: do not fast longer than 3 days without the supervision of a professional.

Milk Thistle - Supports liver health. One of the most common uses of milk thistle is to treat liver prob- lems. Pro- motes skin health. Re- duces choles- terol. Sup- ports weight loss. Reduces insulin resistance.


A 5-Day Fruit and Veggie Natural detox or Cleanse

For 3 days, drink 8-12 glasses of fresh squeezed juice. At least 85% of the juice should be from vegetables. The rest can be fruit such as apple, orange, beet, or celery.
Drink juice throughout the day. If you find you are hungry, add more juice.
On the 4th day, eat only fresh raw fruits.
On the 5th day have fresh raw fruit for breakfast and fresh raw veggies for lunch.
On the 6th day, return to your regular eating schedule.

A 3-Day Natural Detox (Melon Cleanse) 
This cleanse is for those with high blood pressure, but not for diabetics. Do not use this cleanse if you have diabetes.
For 3 days, eat nothing but melons such as cantaloupe, watermelon, and honeydew. You may eat as often as you are hungry as melons digest very rapidly when eaten alone. Make sure your melons are ripe, and drink plenty of water.

This cleanse will help clean your body tremendously. Melons clean the nephronic membranes of the kidneys better than anything known.

 Grape for Natural detox or Cleanse 

This cleanse is excellent for people with mucus, phlegm, or pus build-up in their body manifested through symptoms such as fatigue, asthma, bronchitis, hurting liver, painful bowels, edema, varicose veins, headaches, skin rashes and irritations, and constipation.

Grapes are fantastic for cleaning the whole body. Here are some health benefits of grapes:


  • Most potent of all medicinal foods Detoxify the whole body
  • Contain tartaric acid which removes mucus
  • Stop viruses in their tracks, specifically the herpes and polio virus  
  • High in magnesium which cures constipation
  • Relieve gastritis
  • Reverses chronic acidosis to 7-8 pH
  • High in iron which reverses anaemia
  • Contain Ellagic acid that scavenger carcinogens
  • Contain caffeic acid—a cancer preventative
  • Superior energy source. Eliminate stored solids in tissues
  • Help reverse heart disease
  • Protect from antioxidant damage  Protect from airborne pollutants  Relieve mental exhaustion
  • Soothe the nervous system
  • Improve calcium absorption and also contain calcium
  • Sustain nursing infants (grape juice)

To achieve these results, grapes are best eaten alone as a meal. Grape fasting cleanses the tissues and the taste buds bringing them into harmony with a healthful appetite. Your desire for stimulating foods will be greatly lessened.

Notes: If you develop a coated tongue, do not worry. That means your liver is toxic and is cleaning itself out. You may also notice mucus in your urine or faeces. Do not be alarmed.

When possible, buy certified organic grapes. If you can't find them, buy normal grapes, but clean well. Learn how to best clean vegetables and fruit.

Grape juice should be homemade, not store bought. Process the grapes, including the seeds, in a juicer. Black, seeded grapes are the most nutrient dense.

To purify your blood, create a mixture of homemade grape juice and homemade almond milk. To make the nut milk, soak a cup of almonds over- night. Then, drain off the water and rinse. Place the nuts in a blender or soymilk maker with enough fresh water to cover the nuts. Blend well, adding more water if desired. Strain through cheesecloth to remove fibre. Then, mix the almond milk half and half with fresh grape juice.

You might also incorporate Digestit colon clanse


7 days Natural detox programme for body cleansing


  • DAYS 1-2 – NO Food  

  • DAYS 3-4 – FRUIT ONLY / 3 x Day (apples and red grapes are the best for this fast)if you don't have any apples or grapes what fruits do you have you can use it

  • DAY 5 – INTRODUCE WHOLE GRAIN CARBOHYDRATES

  • DAY 6-30 – ADD VEGETABLES AND PROTEIN TO THE DIET….THIS IS THE REGULAR

  • COMPLETE DIET…INCLUDE ALL THE FOOD GROUPS


Natural detox FOR THOSE WHO CANNOT DO A NO FOOD FAST:


  • DAYS 1-2 – FRUIT ONLY / 3 X DAY (apples and red grapes are the best for this fast) you only Do apples or grapes in the day, but not both if you choose apples, it would be one type of apple for breakfast, another type for lunch, and another type for the 3rd meal. The same goes if you choose the grapes. If you choose apples for their first day, grapes should be eaten the 2nd day and vice versa.½ ½

  • DAY 3 – INCLUDE WHOLE GRAIN CARBOHYDRATES


  • DAY 4 – INCLUDE VEGETABLES


  • DAY 5 – 30 INCLUDE PROTEIN TO THE DIET

 FOR THOSE WHO MAY ONLY WANT TO FAST ONE DAY AND EAT FRUIT THE NEXT DAY:

  • DAY 1 – NO FOOD


  • DAY 2 – FRUIT ONLY


  • DAY 3 – ADD WHOLE GRAINS TO THE DIET


  • DAY 4 – ADD VEGETABLES & PROTEIN TO THE DIET


  • DAY 5 – GO TO REGULAR DIET INCLUDING ALL THE PLANT BASED FOOD GROUPS With PROTEIN AS WELL THIS IS THE REGULAR, COMPLETE HEALTHY DIET…INCLUDE ALL The FOOD GROUPS (fruit, vegetables, nuts, grains, and seeds.

DURING THE FAST, ONLY DRINK WATER THROUGHOUT THE DAY AND YOUR
HERBAL FORMULA

If you feel faint, drink ¼ c. grape juice if you are not a diabetic. If you are diabetic, eat a piece
of fruit instead.

REFERENCES
  Dr. Rudy Davis, ND www.amazinghealth.com
Christiana Moore


Don't forget to Share:

Sitz Bath: Uses and Procedure

Search Results

Web results

Sitz Bath: Uses, Procedure, and Risk Factors

https://vigorphil.blogspot.com/2020/06/sitz-bath-uses-and-procedure.html


What is Sitz bath


Hot Sitz bath
is an partial immersion bath covering only the hip, pelvic and  the anal area (buttocks) with water. The water may contain herbs or essential oils. 
It is a bath that is usually warm used for cleaning and healing.

SITZ BATH TREATMENT INDICATIONS 

WHEN TO USE SITZ BATH

Strengthening pelvic tissues 
Building of nervous vigor
Itching
Relieve pain, 
Chronic constipation 
Relieve pain after an episiotomy (surgical procedure to facilitate child birth) and relieve pain after rectal operation 
Hemorrhoids 
Chronic pelvic Inflammation 
Dysmenorrhea or painful Menstruation 
Boils and abscesses around the anal  region 
Cystitis (painful urination) 

PHYSIOLOGIC EFFECTS OF SITZ BATH 

HOW SITZ BATH WORKS

It increases blood flow in the region thus relieving cramps and spasms in pelvic region and urinary bladder. 
Relaxes the urine nary bladder
Relaxes the internal anal sphineter 
Sitz bath can be done in two ways 
1. Sitz bath alone
2. Sitz bath with hot foot bath 

TYPES OF SITZ BATHS

  •  Baking soda

  • Basic saltwater sitz bath

  • Herbal sitz bath

  • Oil sitz bath

  • Blueberry sitz bath

  •  Sitz bath with witch hazel extract

  • Apple cider vinegar sitz bath

HOW TO MAKE SITZ BATH

THINGS YOU NEED FOR SITZ BATH 

1. A large basin, deep enough for a person to sit in it
2. Basin of ice water
3. Two cold compress towels 
4. Sheet or blanket for wrapping around the body 
5. One bath towel
6. A kettle or pot of boiling water 
7. An extra basin for hot foot bath (if Sitz bath will be done with hot foot bath) 


TREATMENT PROCEDURES FOR SITZ BATH 
1. Pray with the person 
2. Remove the patient should remove their outer clothes 
3. Pour hot water into the basin and dilute it to a temperature the person can tolerate 
4. Close the doors and windows to prevent air drafts
5. Aid the patient while trying to sit in the basin, then gently place the legs of the person into the hot foot bath basin containing a water warm enough to tolerated by the person. if hot foot bath is used
6. Cover the person and basins with the sheet or blanket 
7. Apply the cold compress on the person forehead immediately the person starts perspiring and change the compress every 2 to 3 minutes [cold compress is a towel soaked in cold or iced water then wrung of water and placed around the forehead.] 
8. Occasionally add hot water to both the hot foot bath and the Sitz bath basins every 4 to 5 minutes to maintain the temperature of the water. Be sure to place your hand beneath the hot water in the basin and stir while adding hot water to the basins to avoid burning the patient’s  feet 
9. Continue for 20 to 30 minutes 
10. After completion, pray with patient 
11. Pour cold water on the feet of the person, to close the pores of skin that are opened due to the heat, this protects the person against bacteria 
12. The patient should rest for a while and a then have a shower. 

HOW LONG SHOULD SITZ BATH LAST

Occasionally add hot water to both the hot foot bath and the Sitz bath basins every 4 to 5 minutes to maintain the temperature of the water. Be sure to place your hand beneath the hot water in the basin and stir while adding hot water to the basins to avoid burning the patient’s  feet 
 Treatment should last up to Continue for 20 to 30 minutes, but lease for very sick and weak persons.
Don't forget to Share:

Vegan Meat Analogs

VEGAN MEAT ANALOGS


Vegan Meat analogs


INGREDIENTS (4 servings) 

• 120g (≅ 4.2 oz) dehydrated textured soy protein (or gluten, see p. 18)
•500 g (≅ 1 pound) potatoes
•4 tomatoes
•6 sweet green peppers
•1 onion
•50 g pitted olives
•25 g (≅ 1 oz) capers
•2 garlic cloves
• 1/2 liter (≅ 1/2 quart) unsalted vegetable broth
ADDITIONAL INGREDIENTS
•1 tablespoon coriander or parsley
•7 tablespoons olive oil (each tablespoon adds 133 kcal to the recipe, that is, around 33 kcal per serving)

PREPARATION
1. Soak the textured soy protein in the vegetable broth for a few minutes.
•Peel, wash, and chop the po- tatoes into small cubes.
•Peel and crush the tomato.
•Wash, remove the seeds, and chop the pepper.
•Peel and grind the garlic and
slice the onion.

2. Boil the potatoes and pep- pers for 20 minutes. Drain In a pot, sauté the onion until it becomes transparent. Add the potherbs. Stir and add the tomato, garlic, olives, capers, peppers, and finally the textured soy protein. Continue cooking for 10 minutes and add the pota- toes. Cook for an additional 10 minutes.

 3.  Serve hot.
Don't forget to Share:

Best Eggless Potato Salad recipe

Eggless Potato Salad recipe


Eggless Potato Salad


2 lbs of potatoes (Approx. 5 medium unpeeled potatoes)

½ cup apple, diced (unpeeled)

¼ cup onion, diced

¼ cup of red pepper, diced

1 garlic clove, crushed

1 Tbsp sweet pickled relish

1 Tbsp dijon mustard

2 tsp apple cider vinegar

½ cup of tofu mayonnaise

Salt and pepper to taste

Lemon juice

2 Tbsp green onions, diced

vegan salad, potatoes preparation,


How to Make It

1. Cut the potatoes into small cubes, and boil them for 20 minutes or until tender.

2. While the potatoes are cooking, dice the apples and set them aside in a small bowl with a splash of lemon juice to prevent them from turning brown.

3. Drain the potatoes and let cool.

4. In a bowl, combine the potatoes, apple, onion, pepper, and garlic.

5. Add the pickled relish, mustard, and tofu mayonnaise and mix well.

6. Add salt and pepper to taste.

7. Garnish with green onions and serve!


Don't forget to Share:

Breakfast Cereal Cookies recipe

Cereal Cookies
Cereal Cookies


2 c. leftover cooked whole grain cereal

1 tsp. maple extract 

1/2 c. whole wheat flour

2 tsp. Vanilla

2 tbsp. nut butter

1/2 c. chopped nuts or coconut (opt.)

1/4 c. Honey

1/2 c. chopped dried fruit

1/4 tsp. salt

PUT all ingredients in a bowl, and MIX well with hands. DROP onto sprayed cookie sheet by rounded tablespoon, flattening slightly with fingers. BAKE at 350° for 30–40 minutes. 

YIELDS: 12 two inch cookies

Don't forget to Share:

Healthy granola recipe

Health granola recipe  
Healthy vegan Granola
Add caption


Granola ingredients 

8 c. old fashioned rolled oats

1 c. unsweetened coconut flakes 

1/2 c. sunflower seeds

 1 c. chopped pecans

COMBINE in large bowl.

2 ripe bananas
 1 c. pitted dates
 3/4 c water 
1 1/4 tsp. salt

Granola Preparation 
HEAT dates and water together, then blend together with bananas and salt.

MIX well. SPREAD on cookie sheets 1/2" thick. BAKE at 225° for 90 minutes, stirring every 30 minutes until golden and almost dry. TURN oven off, and leave pans in oven to complete drying.

Variations In Granola 
1. For low-fat granola, omit nuts, seeds and coconut.

2. For Omega-3 and Omega-6 fatty acid-rich granola, add 1 c. ground flaxseed (1/2 c. whole) and use walnuts instead of pecans.

3. For high-fiber granola, leave out 2 c. oats and add 1 1/2 c. raw wheat bran.

Don't forget to Share:

Activated Charcoal medicinal Uses, Doses And Contraindications

ACTIVATED CHARCOAL


ACTIVATED CHARCOAL MEDICINAL USES, DOSES AND CONTRAINDICATIONS 

How Charcoal Works 
Activated Charcoal has an adsorptive effect because of the large surface area of individual grains, with their crevices and pores.  Actived Charcoal can absorb hundred times its own weight in poisons, gases, toxins and chemicals.

Activated Charcoal can be used for the following health challenges:

1. Overdoses
2. Poison Ivy
3. Staph infections
4. Eczema 
5. Eye infections 
6. Oral lacerations and herpes simples 
7. Diarrhea
8. Gas
9. Insect/snake bites 
10. Inflammation 
11. Hepatitis 
12. Gastritis 
13. Colitis 
14. Peptic ulcers 
15. Infected cuts 
16. Internal and external infections 
17. Phlebitis 
18. Gastrointestinal problems 
19. Pharyngitis
20. Bad breath 

METHODS OF CHARCOAL USAGE 
A. ORALLY 
B. POULTICE 
C. AS BATH

ORAL USAGE OF CHARCOAL 
Activated Charcoal has no toxic effects nor Overdose. It can be taken as often and as much as needed. 

CHARCOAL PREPARATION 
Careful put 1 to 2 tablespoons of charcoal into a cup,  add little amount of water into the cup and stir to get a paste then add additional water to fill the glass cup.  

Charcoal is best taken 2 hours after or before meals. 

CHARCOAL AS POULTICE 
Activated Charcoal powder can be mixed with water and used as a poultice for snake bite, bee stings, spider bite and  other Insects.  

PREPARATION 
Mix the Charcoal powder into a little water until the mixture has a consistency of a paste. 
Grind flaxseed or corn search may be added to the charcoal mixture to keep the poultice from becoming dry.  Mix 1 to 3 large spoonfuls of ground flaxseed or 2 large spoonfuls of corn starch to a cup of boiling water and mix with charcoal to get a paste. 
Spread the charcoal paste mixture on half of a cloth or paper towel, fold the other half of the cloth or paper towel over the charcoal paste. 
Gently place the poultice on top of the affected skin area. Cover the entire poultice with a piece of plastic or waterproof material to keep it from drying out. 

CAUTION 
It is best not to put the charcoal powder directly on the skin if the skin is cut or broken. Sometimes charcoal can give a tattooing effect if the skin is broken. 

Charcoal AS BATH 
Charcoal bath is the immersion of the body or part of the body in a water containing charcoal. 
Charcoal bath is excellent for individuals with skin disorders such as atopic dermatitis, infections, skin irritations, Eczema, for anti bacterial, deodorizing, detoxifying. 
Charcoal bath is also used for smokers and alcoholics who need detoxification as well as any one who needs to detox. 

Charcoal bath will remove impurities and relieve fatigue. 

HOW TO GIVE CHARCOAL BATH. 

Put about 6 cups (2 lbs) of granular charcoal in a cloth bag, tie it and place it in the tub, fill the tub with warm water and soak yourself. 
After the first use, dry the charcoal, when using a second and third time add an extra [one] cup  of granular charcoal to the cloth bag. Discard after the third use. 

Charcoal may adsorb and inactivate other medications. Always take charcoal 2 hours before or after other drugs except for the case of overdose. 

Charcoal CONTRAINDICATION
You may take charcoal intermediately for long periods or regularly for up to 12 weeks. 
However, it should not be taken regularly for extended periods of over 12 weeks. Do not give charcoal to an unconscious person.

OTHER USES OF CHARCOAL. 

DIARRHEA
Charcoal is one of the most effective treatment for diarrhea. 

For adults, add 2 heap tablespoons of charcoal in a glass of charcoal water 4 times per day. Drink one more glass of charcoal water followed by one glass of clear water for each additional watery stool. Use one half of the adult dose of charcoal for children. 

Watch for dehydration, and prepare an oral rehydration therapy drink. 

NAUSEA AND VOMITING. 
Give the adult dose [1 to 2 large spoonfuls in ½ glass of water]  each time vomiting occurs [for a child, use ½ the adults dose].  If the charcoal is vomited, give another dose immediately. Always follow the dose of charcoal with a full glass of water. 

LIVER AND KIDNEY DISEASES.
Charcoal is beneficial for the treatment of kidney or liver failure. Give the oral charcoal dose to enhance elimination of toxins from the body and then apply the poultice to the location of the kidney at the mid back and abdomen for liver disorders 

INTESTINAL GAS OR BLOATING 
Give the adult dose [1 to 2 large spoonfuls in ½ glass of water]  each time vomiting occurs [for a child, use ½ the adults dose] as needed to control symptoms. 

EYE OR EAR INFECTIONS
Put the poultice over the infected eyes or ear, and leave it in place for a least 4 hours or overnight. 

Applying heat to the poultice increases its effectiveness. 


Don't forget to Share:

GET NOTIFIED BY EMAIL WHEN THERE IS A NEW POST

Enter your email address:

Delivered by FeedBurner

ANY CONCERNS OR QUESTIONS? Get in touch with us by filling out the form below.Contact Form

Name

Email *

Message *

Popular Posts

SUBSCRIBE TO OUR EMAILING LIST

Subscribe

* indicates required
/ ( mm / dd )